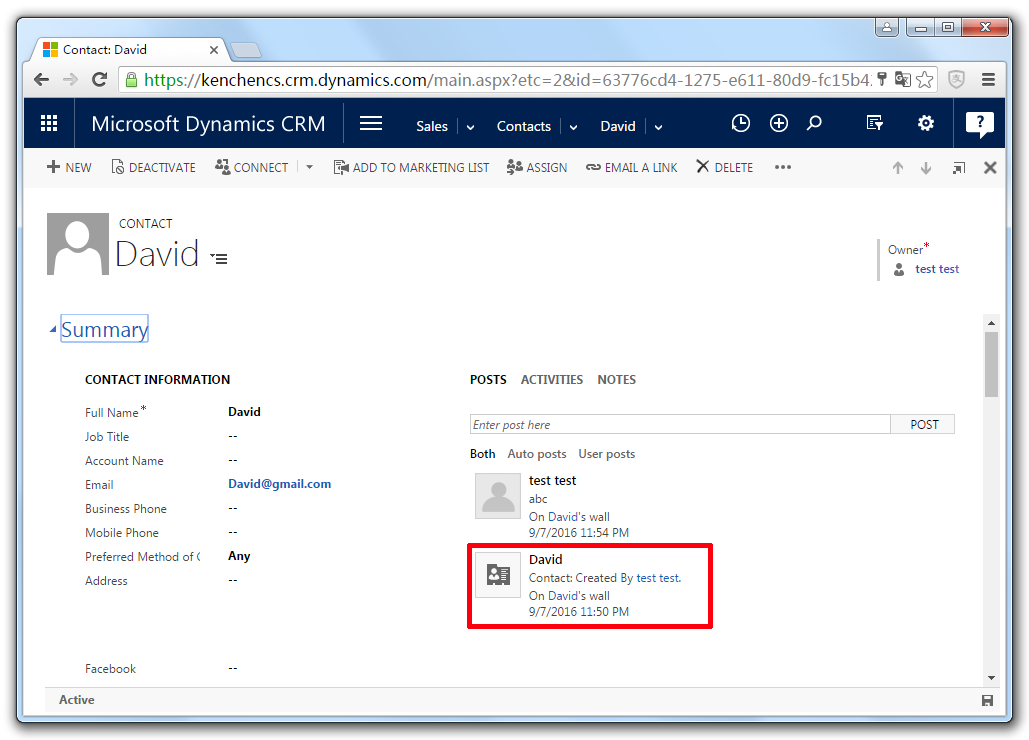
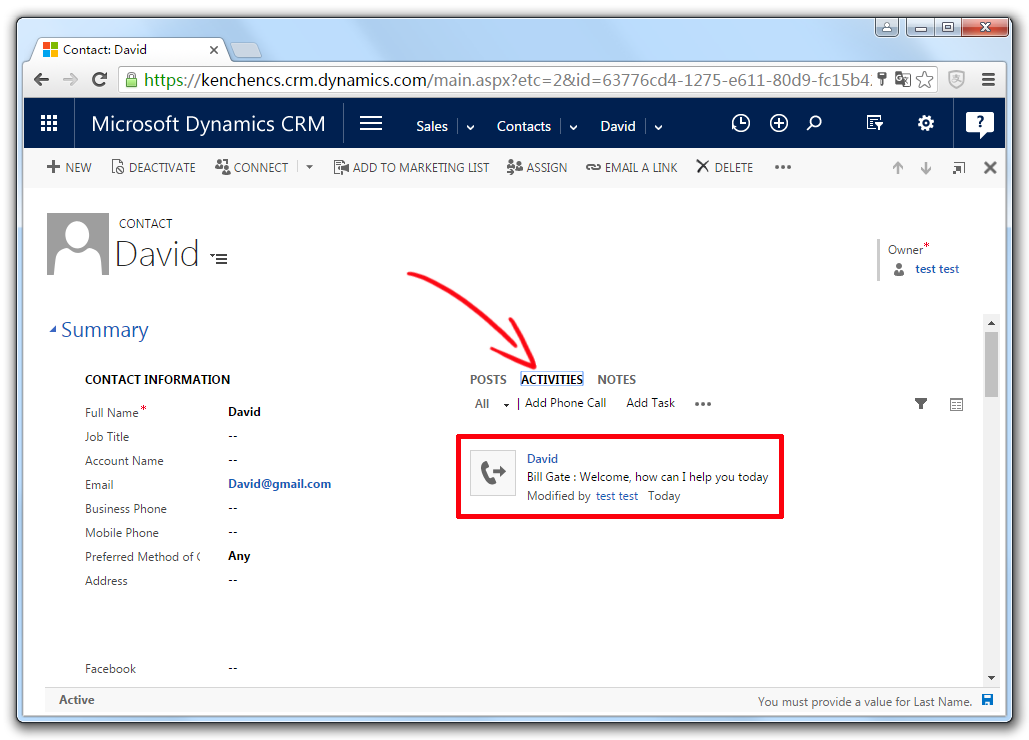
Microsoft Dynamics CRM Integration

This guide documents the older Web Forms CRM bridge using ChatApi.asmx. It does not apply directly to the current .NET 8 package. The bridge package is not available for download here; contact us if you maintain an older deployment and need the integration files.
Ask about the legacy integration
0. Before You Begin
Please install the main DChat deployment and the API demo site first.
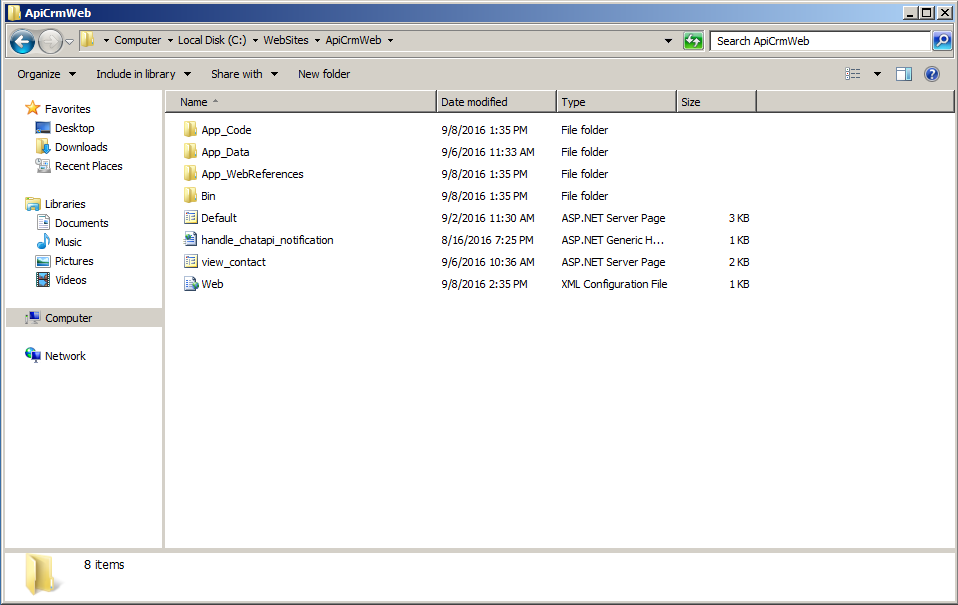
1. Copy Integration package to your application directory
Unzip ApiCrmWeb.zip to a new folder where you want the site to be hosted from (eg C:\websites\ApiCrmWeb).
2. Configure the Web Site in IIS
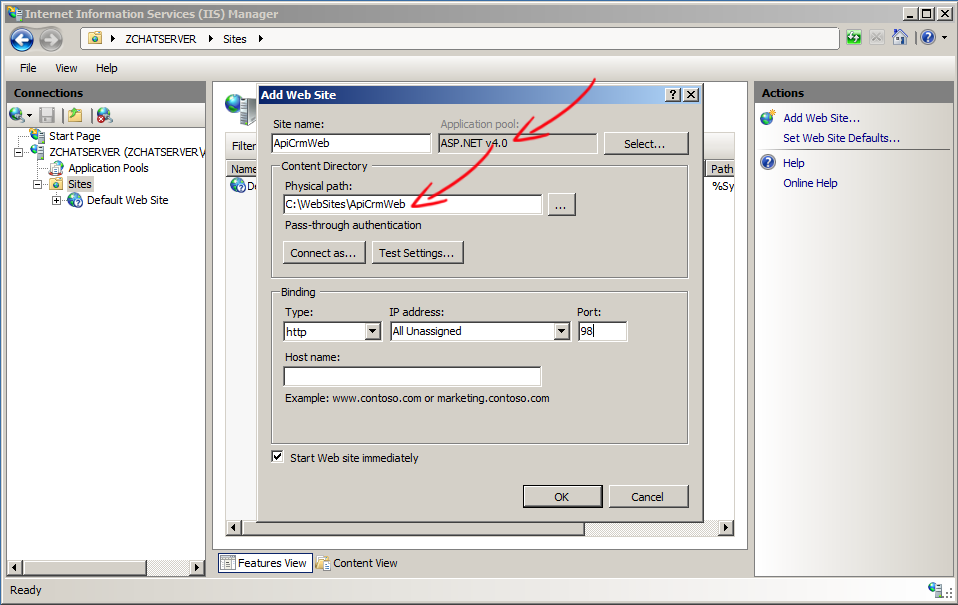
Open up IIS Manager, select the Default Web Site (under Sites) and click the Stop button. Now, right click on Sites and select Add Website...
Provide a site name and the folder you want the site to be hosted from.
3. Modify DChat Web site web.config to register ChatApiNotificationUrl and ChatApiKey
ChatApiKey creates a trusted connection between the main DChat deployment (chat.example.com) and the CRM bridge site (crm-bridge.example.com).
Please open the main DChat site's web.config and register the notification URL used by the CRM bridge listener, for example https://crm-bridge.example.com/handle_chatapi_notification.ashx.
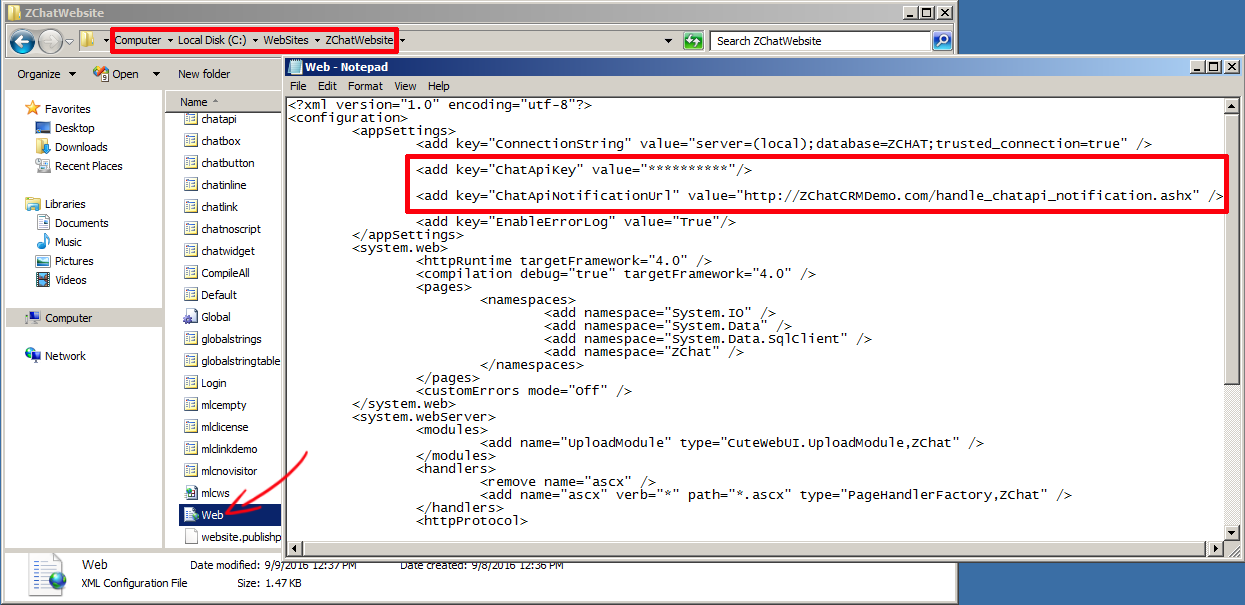
4. Modify CRM Web web.config to register ChatApiServiceUrl and ChatApiKey
ChatApiKey in the CRM bridge web.config must match the ChatApiKey configured in the main DChat deployment.
Please open the CRM bridge web.config and register the service URL exposed by your DChat deployment, for example https://chat.example.com/ChatApi.asmx.
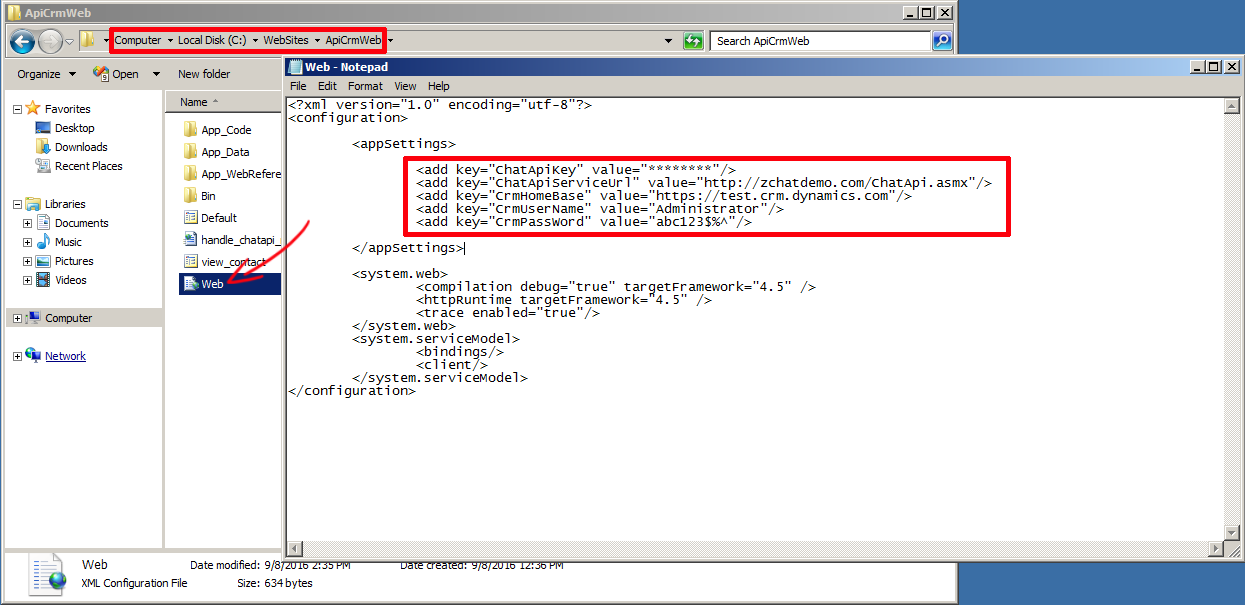
5. You are all set!
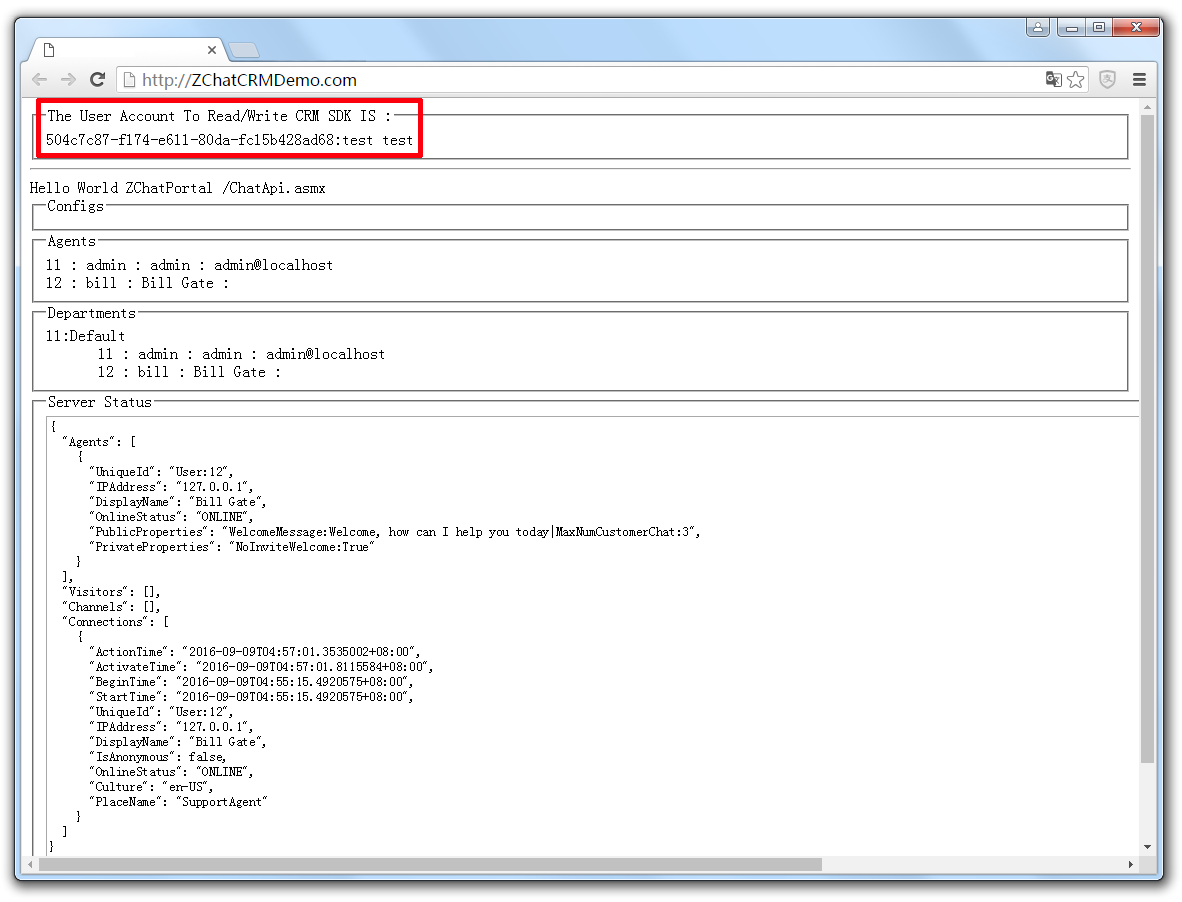
If you installed CRM Web correctly, you will see the following screen that lets you know you're good to go.
6. Start a chat conversation and test interaction between CRM data and chat records
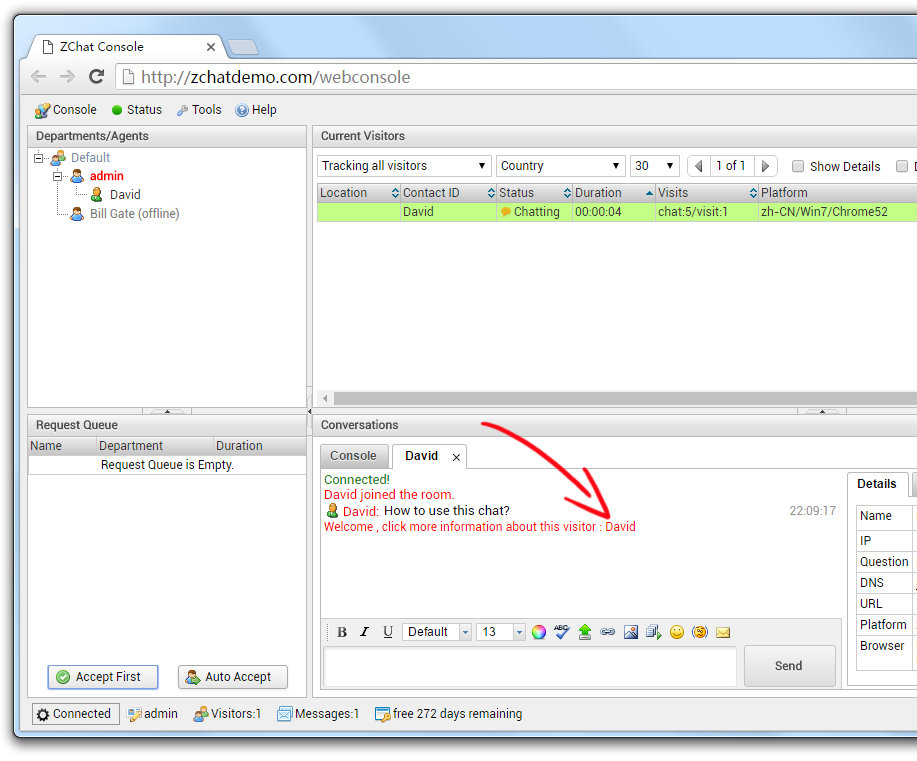
Click "Welcome, click more information about this visitor: Tester". A new window will be opened.
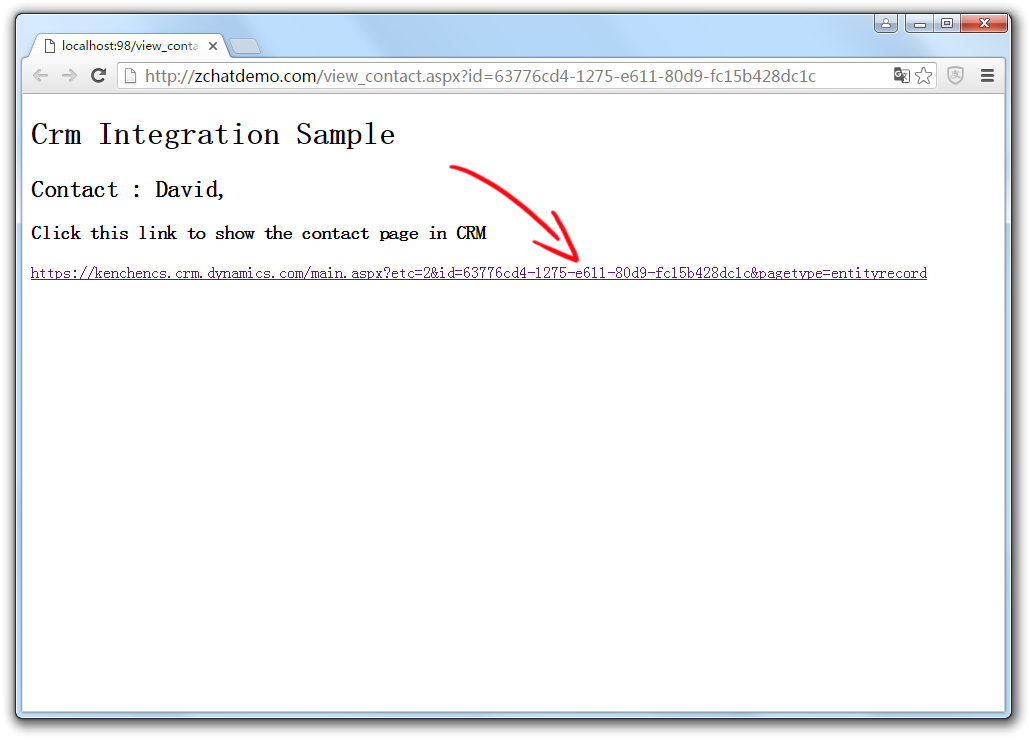
view_contact.aspx is an example showing how to access Contact Object. Click and you will enter CRM page.